 In this post, we’re going elaborate a little on how to add Ember FastBoot t
o your mu-project. This should not be considered as a full blown tutorial, but rather as a set of notes to get you started.
In a nutshell, Ember FastBoot introduces server side rendering on your ember app, which should not only improve user experience by serving static content first, but also make your website more SEO friendly. For more info, I would recommend you to check out https://ember-fastboot.com/.
Setting the scene
All right, let’s get started. Assume you’re writing the new blogging app, called “mu-fastboot-example”.
It has a very simple data model with two entities. A blog post, which has a title, content, an author and many comments. You can find the definition here. The backend needs a frontend of course and this has been published here.
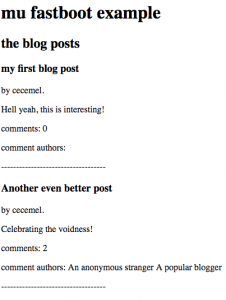
Assume for now, we only need an index page, which displays an overview of the current posts along with the number of comments to this post, and the authors of the comments. A blog-post-summary component was created and its template may be found here.
Firing up both frontend and backend, your home page would look like this.
Fetching your index page with a JavaScript disabled client, like e.g. curl, results in a totally SEO unfriendly, user unfriendly blank page, which waits till all resources are loaded before showing something.
Adding FastBoot
As, https://ember-fastboot.com/docs/user-guide#architecture will tell you, two components are involved: the ember addon fastboot, and the application server itself, which will pre-prender your app.
Installing fast boot add on is as simple as typing:
ember install ember-cli-fastbootThe nice thing is, locally, you can immediately test the result of adding fastboot. Type
ember fastbootAnd to see the result (on port 3000):
curl localhost:3000
<!-- snippet from the initial html page --><div id="ember981" class="ember-view"><h3> Another even better post</h3>by cecemel.<p> Celebrating the voidness! </p><p>comments: 0</p><p> comment authors: <!----> </p><!-- end snippet -->
caveats
There is still an issue. As you might have noticed, the second blog post doesn’t contain any comments or any comment authors.
This because, FastBoot decides returning the page to the client, once the model() hook resolves (or beforeModel(), afterModel()).
If there is a component making an asynchronous call, e.g. counting the comments for each post, FastBook won’t consider this .
The trick is, to make sure these async calls are resolved before, the model() hook is resolved. You could change app/routes/index.js e.g. to the following:
import Ember from 'ember';

export default Ember.Route.extend({
    fastboot: Ember.inject.service(),
    model() {
        if (this.get('fastboot.isFastBoot')) {
            return this.store.findAll('blog-post', {include: "comments"});
        }
        return this.store.findAll('blog-post');
    }
});
This result of this change, can be seen immediately:
curl localhost:3000
<!-- snippet from the initial html page --><div id="ember981" class="ember-view"><h3> Another even better post</h3>by cecemel.<p> Celebrating the voidness! </p><p>comments: 2 </p><p> comment authors: An anonymous stranger A popular blogger <!----> </p><!-- end snippet -->
Unfortunately, this makes FastBoot a little less transparent then one would have initially hoped for. More information may be found at FastBoot.
Deploying
FastBoot has some nice deploy possibilities such as with AWS and Heroku, but in our case, we’ll go for the custom server. At the time of writing, the documentation is NOT up to date, and as an app server you should use, fastboot-app-server instead of fastboot.
Just as with normal ember apps, in your app root, you build with
ember buildwhich should, among the normal files, also create a dist/fastboot/ folder.
To host everything, you should follow the instructions described here.
FORTUNATELY, to ease the deploy, a docker image has been created, which can easily be added to your mu-project, like e.g. here .
As usual, firing the project up with
docker-compose stop; docker-compose rm -f; docker-compose up and you should have a working app.
So, that’s it. In case of questions, feel free to ask.